I’ve spent the last few weeks diving into the world of Docker containers to understand how they work and how they can be improve our deployment process. While it was clear to me that Docker can provide a huge amount of value to our deployment and ops processes, it took me a while to understand exactly how to use it.
Images and Containers
Docker has two main concepts that we need to understand: Images and Containers. Images define the environment you application needs in order to run. For node apps, this probably includes things like your source code, node_modules directory, and package.json and package-lock.json files. For static apps, it may just include static HTML. For ruby apps, it may be your source plus your bundle file. It all depends on your app.
Images are built from your source and pushed into repository, much like an NPM package or a Ruby gem. Once an image is built and published to a repository, anyone else on your team can pull that image down and use it to to create a container, which is effectively just an instance of our image.
The important takeaway is that Images define the application environment while Containers actually run that environment.
Building a Docker Image
All Docker images are build from a Dockerfile. A Dockerfile is a file that just has a set of commands telling Docker how to “wrap” the application environment into a reusable Image that can be used to create containers. The contents of a Dockerfile looks more or less just like a series of bash commands. These commands are executed when we run $ docker build and the output of those commands makes up our image.
Dockerfile
Your application’s Dockerfile should live in your app’s repo alongside the source code. It doesn’t make a ton of sense for your Dockerfile to live outside of your application’s repo since your Dockerfile will be responsible for creating an image that will be used to eventually run the application. Ultimately, the application developer is responsible for writing their own Dockerfile to create their image.
Your first Dockerfile
Let’s create a simple Dockerfile that only contains Nginx. Create a Dockerfile and add the following:
FROM nginx
The FROM command is almost always the first command in every Dockerfile. It tells Docker that we are basing our image from an already existing image. In this case, we are pulling down the nginx image and using it as the basis for our image.
To build this image, run the following command. (Make sure that you are in the same directory as our new Dockerfile.)
$ docker build .
That’s all we need to create our first image! If you run $ docker images in your teminal, you should see something like this:

Having our first image is great, but it’s only the first step. Now, we need to use that image to create and run a container. Run $ docker images again. Take note of the IMAGE ID (c431399b6d03 in the image above, we’ll call it <<HASHED_ID>>). Copy that ID from your terminal and then run the following command:
$ docker run -p 8000:80 <<HASHED_ID>>
This command tells docker to create and run a container from our image with the ID <<HASHED_ID>>. Now, open your browser and navigate to http://localhost:8000. You should see the standard nginx splash screen:
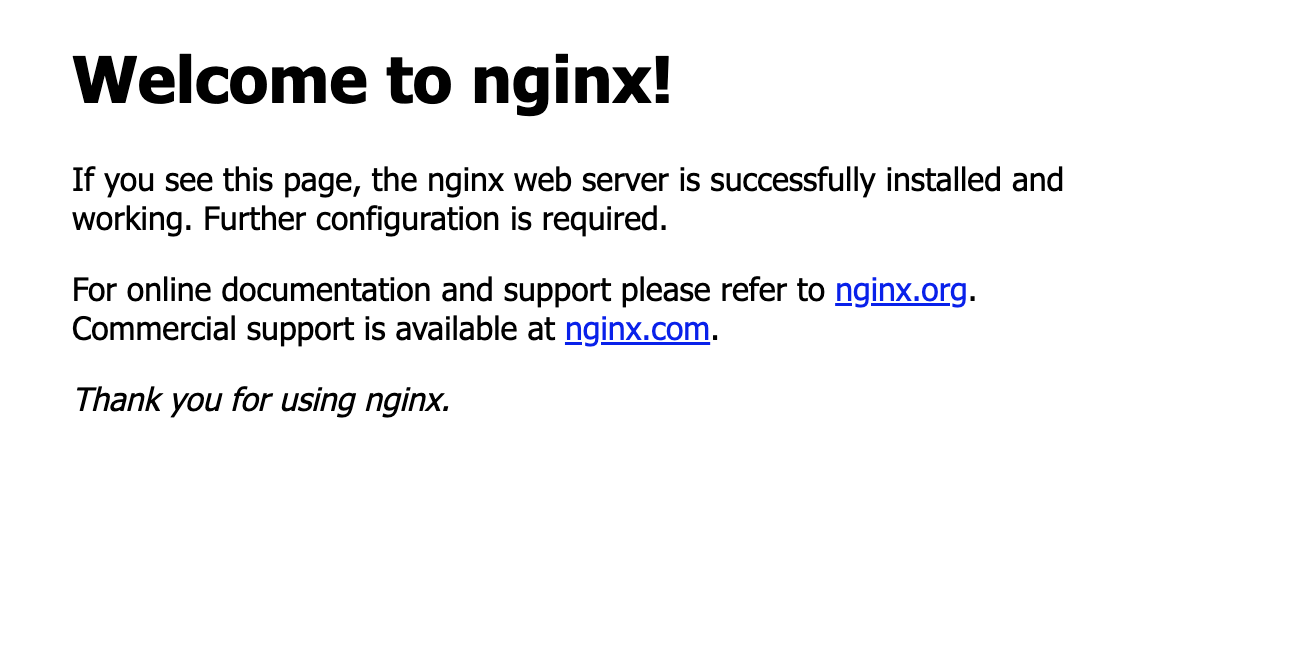
Viola! We are now running an Nginx container from an image we created!
Tagging your Docker image
You may be wondering about the <<HASHED_ID>> part from the step above. When we run docker build, Docker automatically assigns our image a generated ID so it can be referenced laster. While we can continue to use that ID, it isn’t the best developer experience and it’s not that easy to remember! When we build our image, we can create a Docker image with a human-readable tag. Docker will still create our image with it’s generated ID, but it will also tag that ID with whatever name we provide it. Let’s rebuild our image and give it the tag my-first-docker-image:
$ docker build -t my-first-docker-image .
If you run $ docker images again, you will see that the Repository field is now populated with my-first-docker-image:

Our run command from above can now be changed to:
$ docker run -p 8000:80 my-first-docker-image
Much better!
In Summary
Creating Images and running them in Containers is only scratching the surface for what Docker can do. Docker does have a bit of a learning curve, but once you get the hang of it, you won’t be able to work without it!